Delegate
Participation in BandChain doesn't require you to be a validator. Instead, you can delegate BAND tokens to any validator and earn a share of the fees and rewards associated with block creation. However, it's important to note that staking with a validator involves certain risks. Make sure to familiarize yourself with the potential dangers related to validator staking
This tutorial will assist you in staking your BAND tokens easily and efficiently
Step 0 — Before you start
- Download and install the newest version of Ledger Live on your desktop machine.
- Update your Ledger device to the newest firmware.
- Install the latest version of the Cosmos App on your Ledger device.
- Have some BAND on BandChain mainnet
Step 1 — Navigate to Cosmoscan
To begin, assume that you have BAND on the BandChain, then navigate to the website cosmoscan.io. This website is our official block explorer and is a crucial tool for interacting with the BandChain.
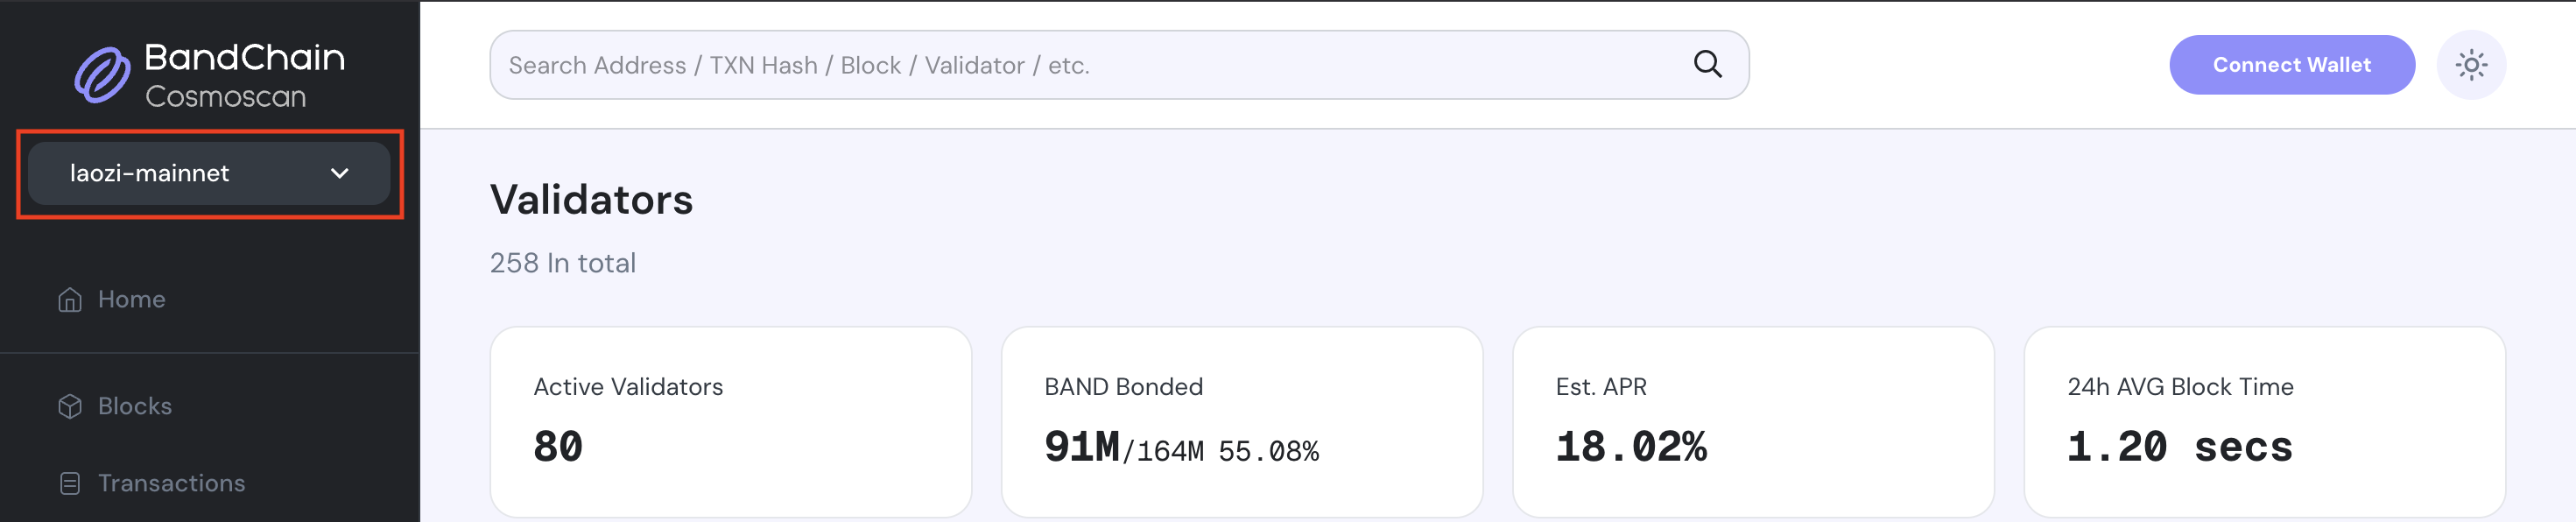
Step 2 — Make sure you in the right site
Once you're on the site, make sure the url is https://www.cosmoscan.io and ensure that you're operating on the mainnet. You can verify this by locating the network information on the top-left corner of the website interface. The mainnet is the primary network for transacting tokens.
Step 3 — Click to connect wallet
Next, you will need to connect your wallet to the website. see Connect Wallet Guide before continue
Step 4 — Navigate to Validators page
Proceed to the validators page by clicking on Validator located in the navigation bar. or navigate to Validators. Once on the validators page, you'll see a list of all validators that you can choose to delegate your tokens to.
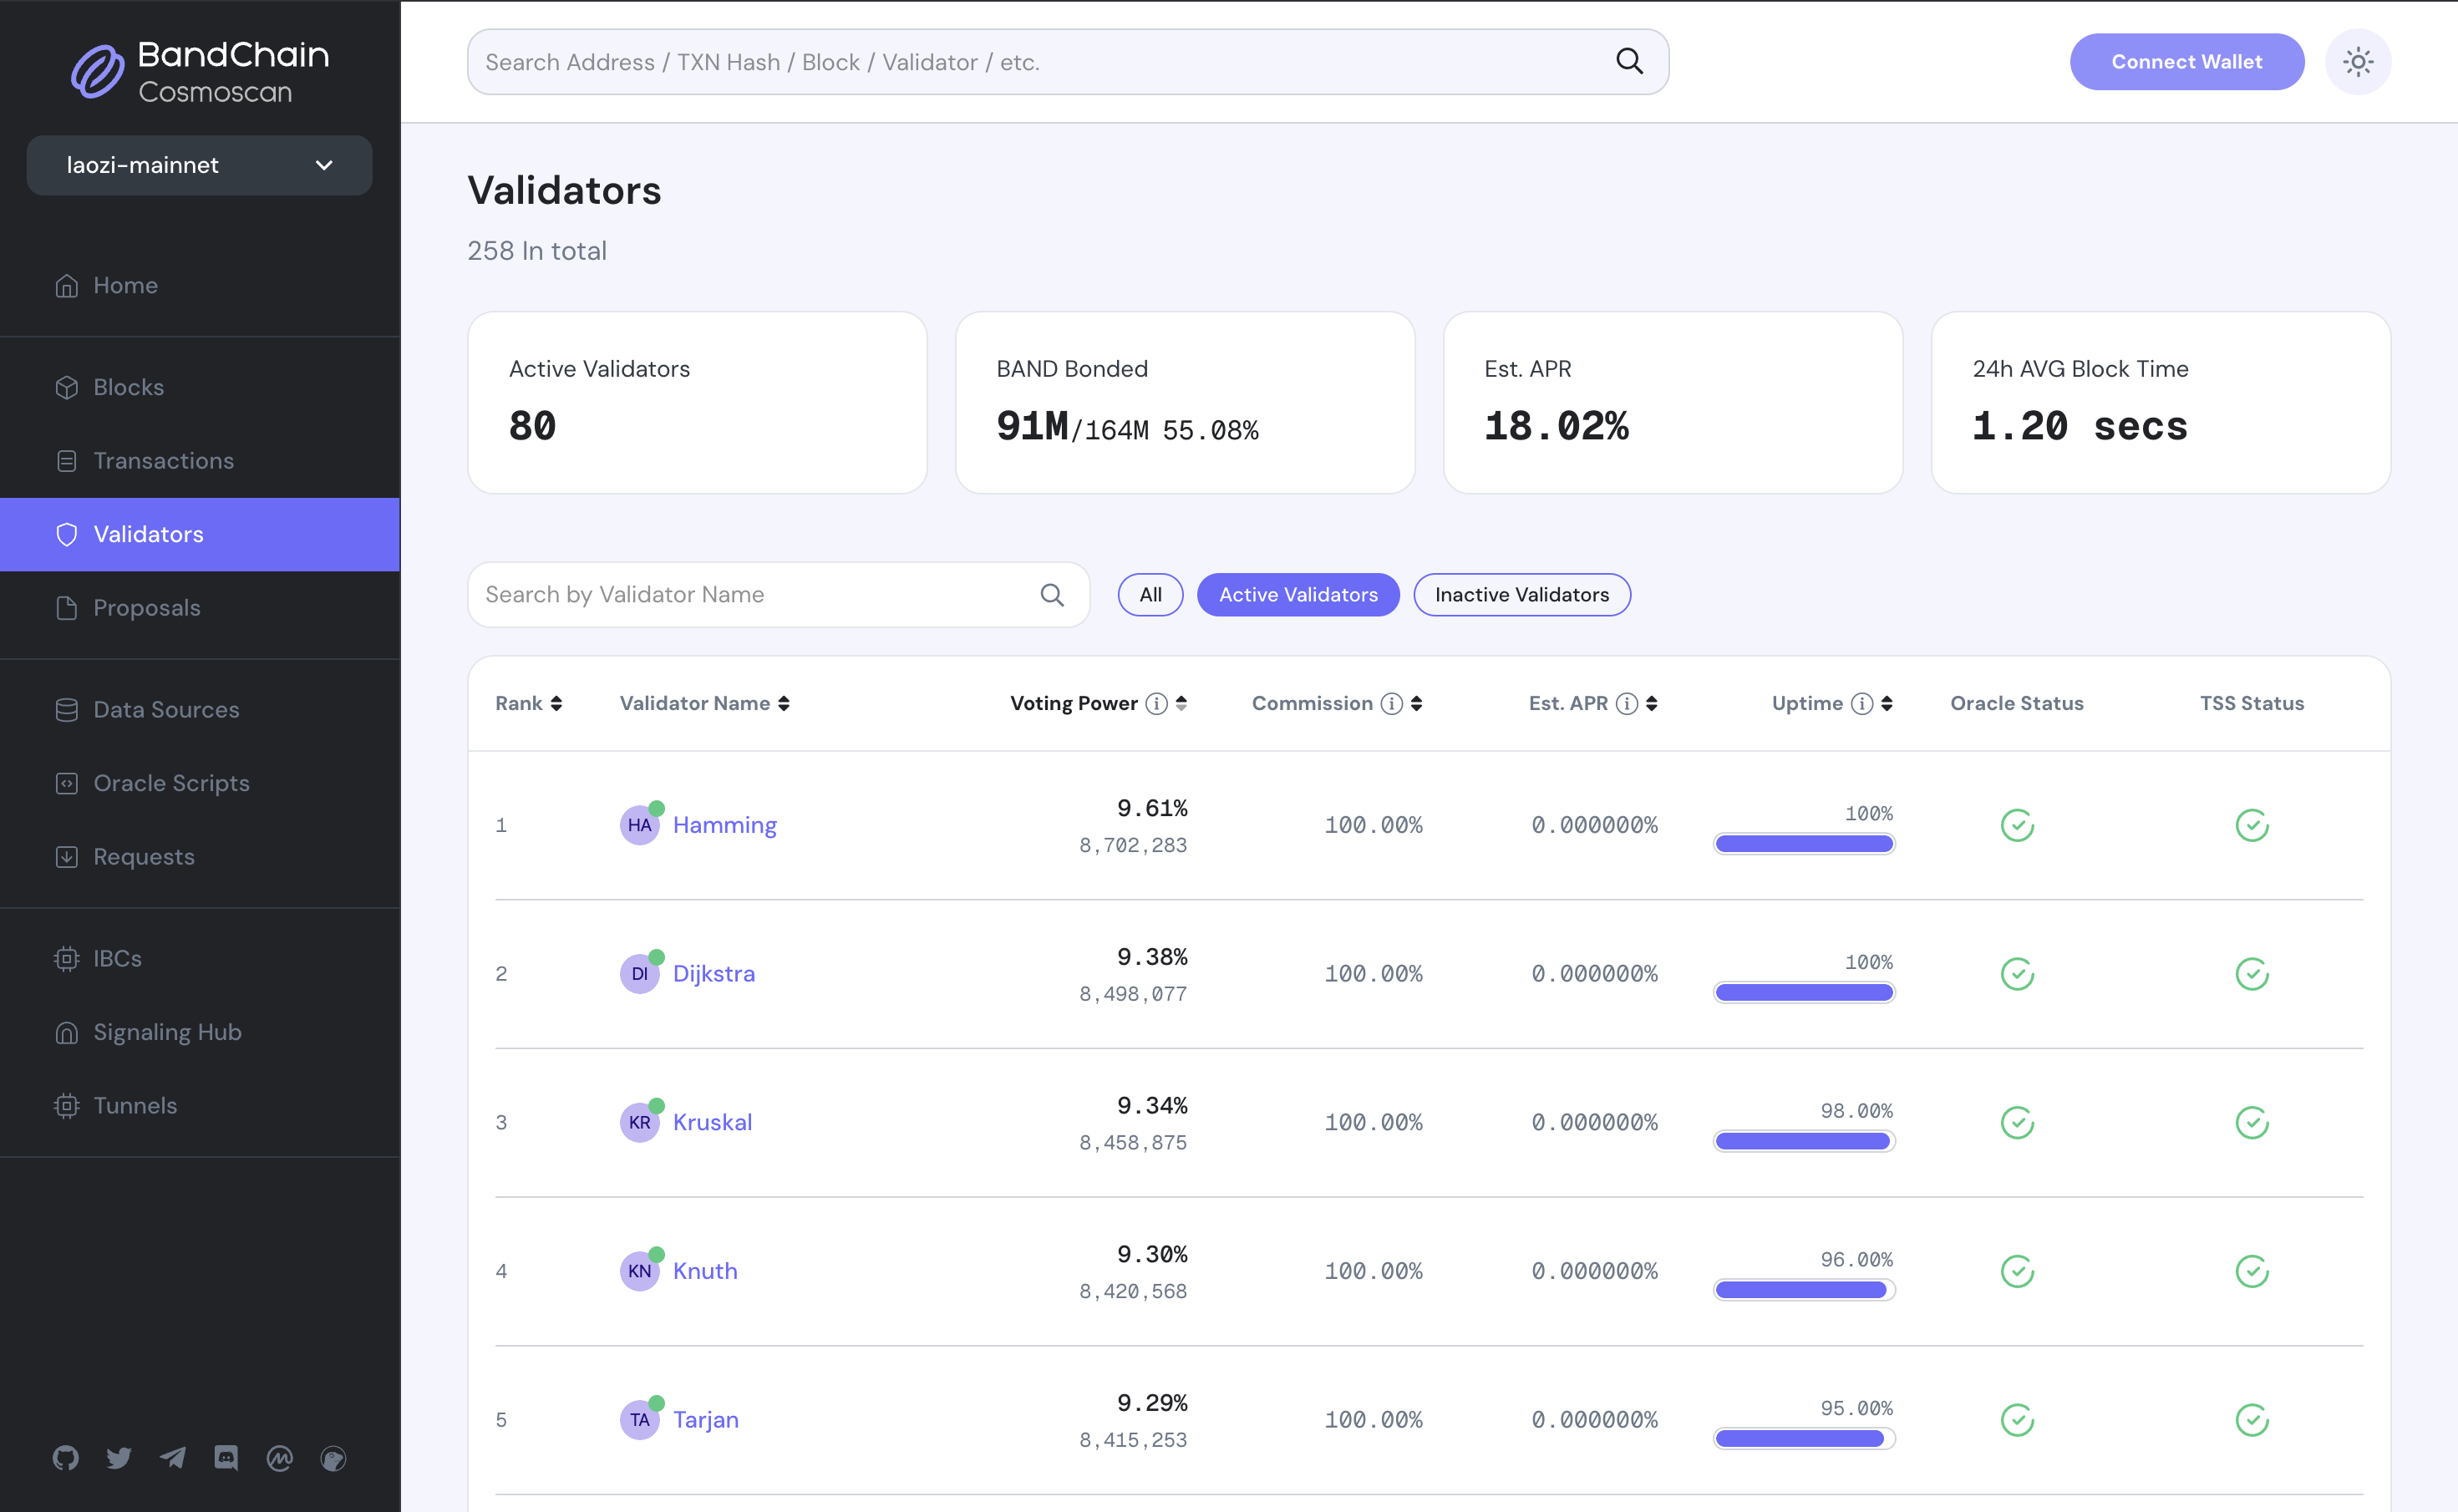
Step 5 — Choose a validator
Choose a validator that you wish to delegate to. This decision should be based on various factors (check out How to choose a validator section) Upon clicking on a validator, you'll be presented with specific information about them. This typically includes their identity, performance statistics, commission rates, and more.
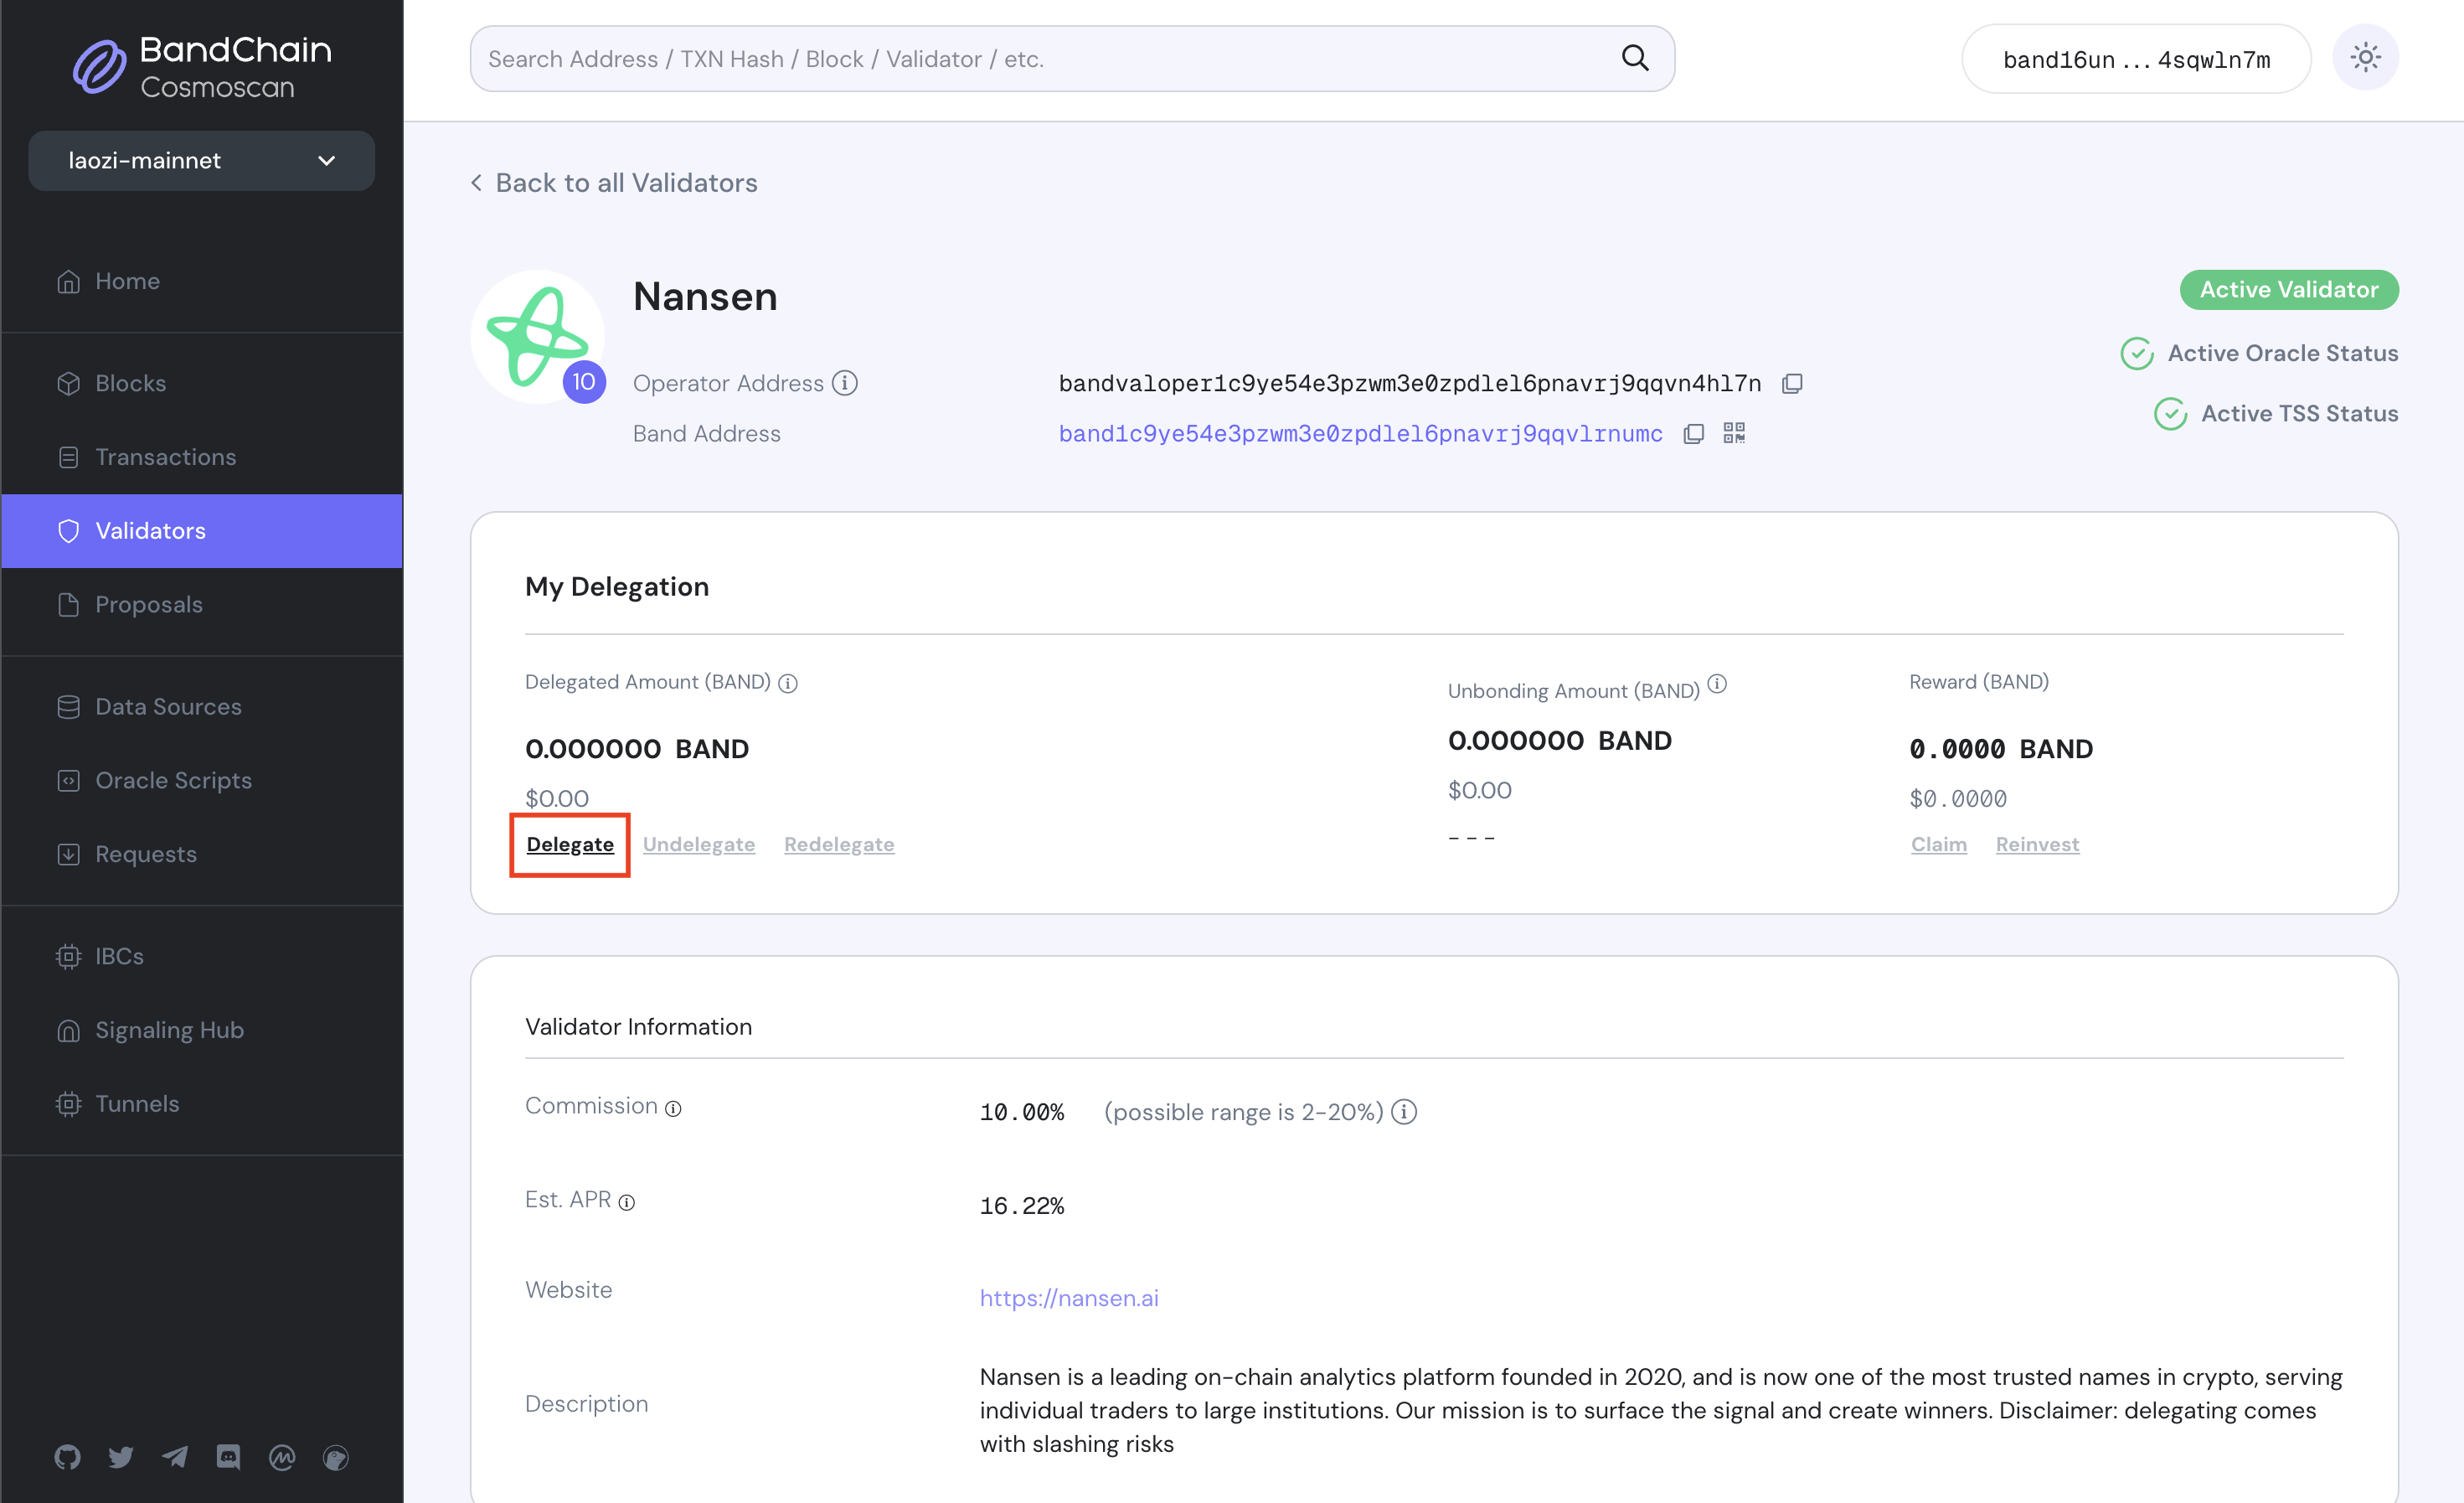
Step 6 — Delegate to validator
Scroll down to the Your Delegation Info section. This area provides detailed information about your current and past delegations with the selected validator. You'll notice a Delegate button within this section – click on it to initiate the delegation process.
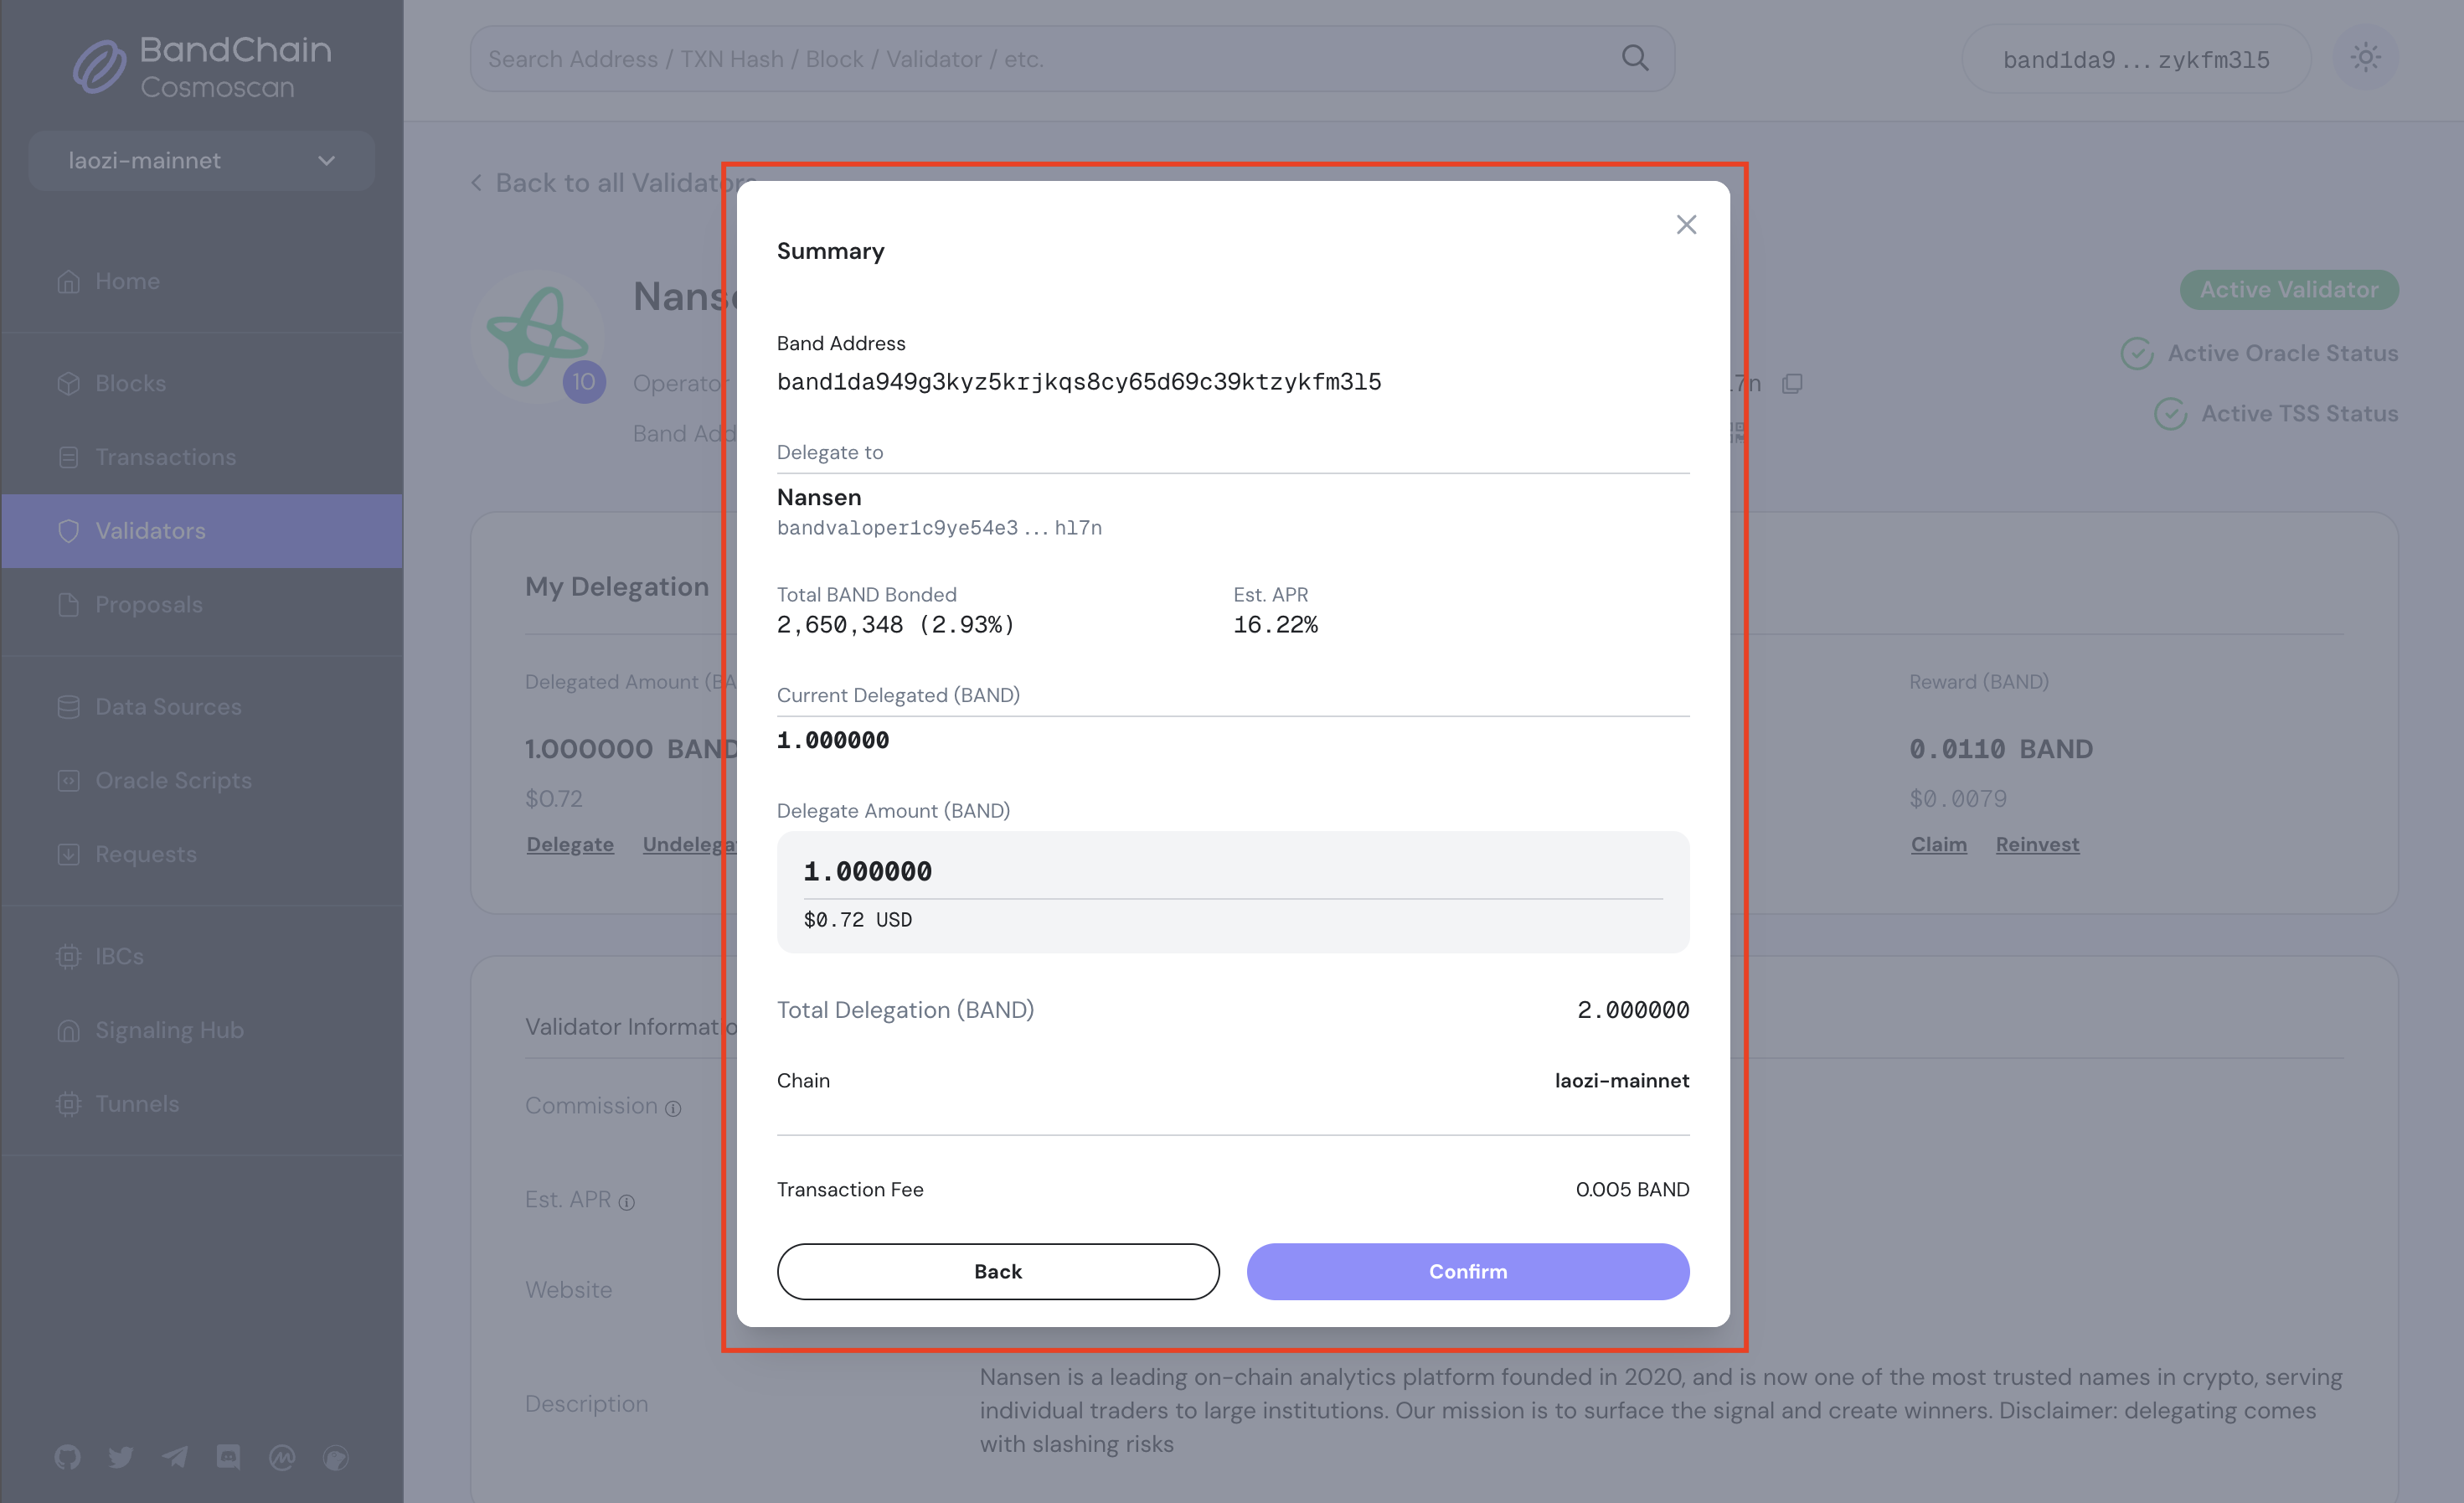
Upon clicking Delegate, a new window will pop up. Enter the amount of BAND tokens you wish to stake in the provided field, and then click Next.
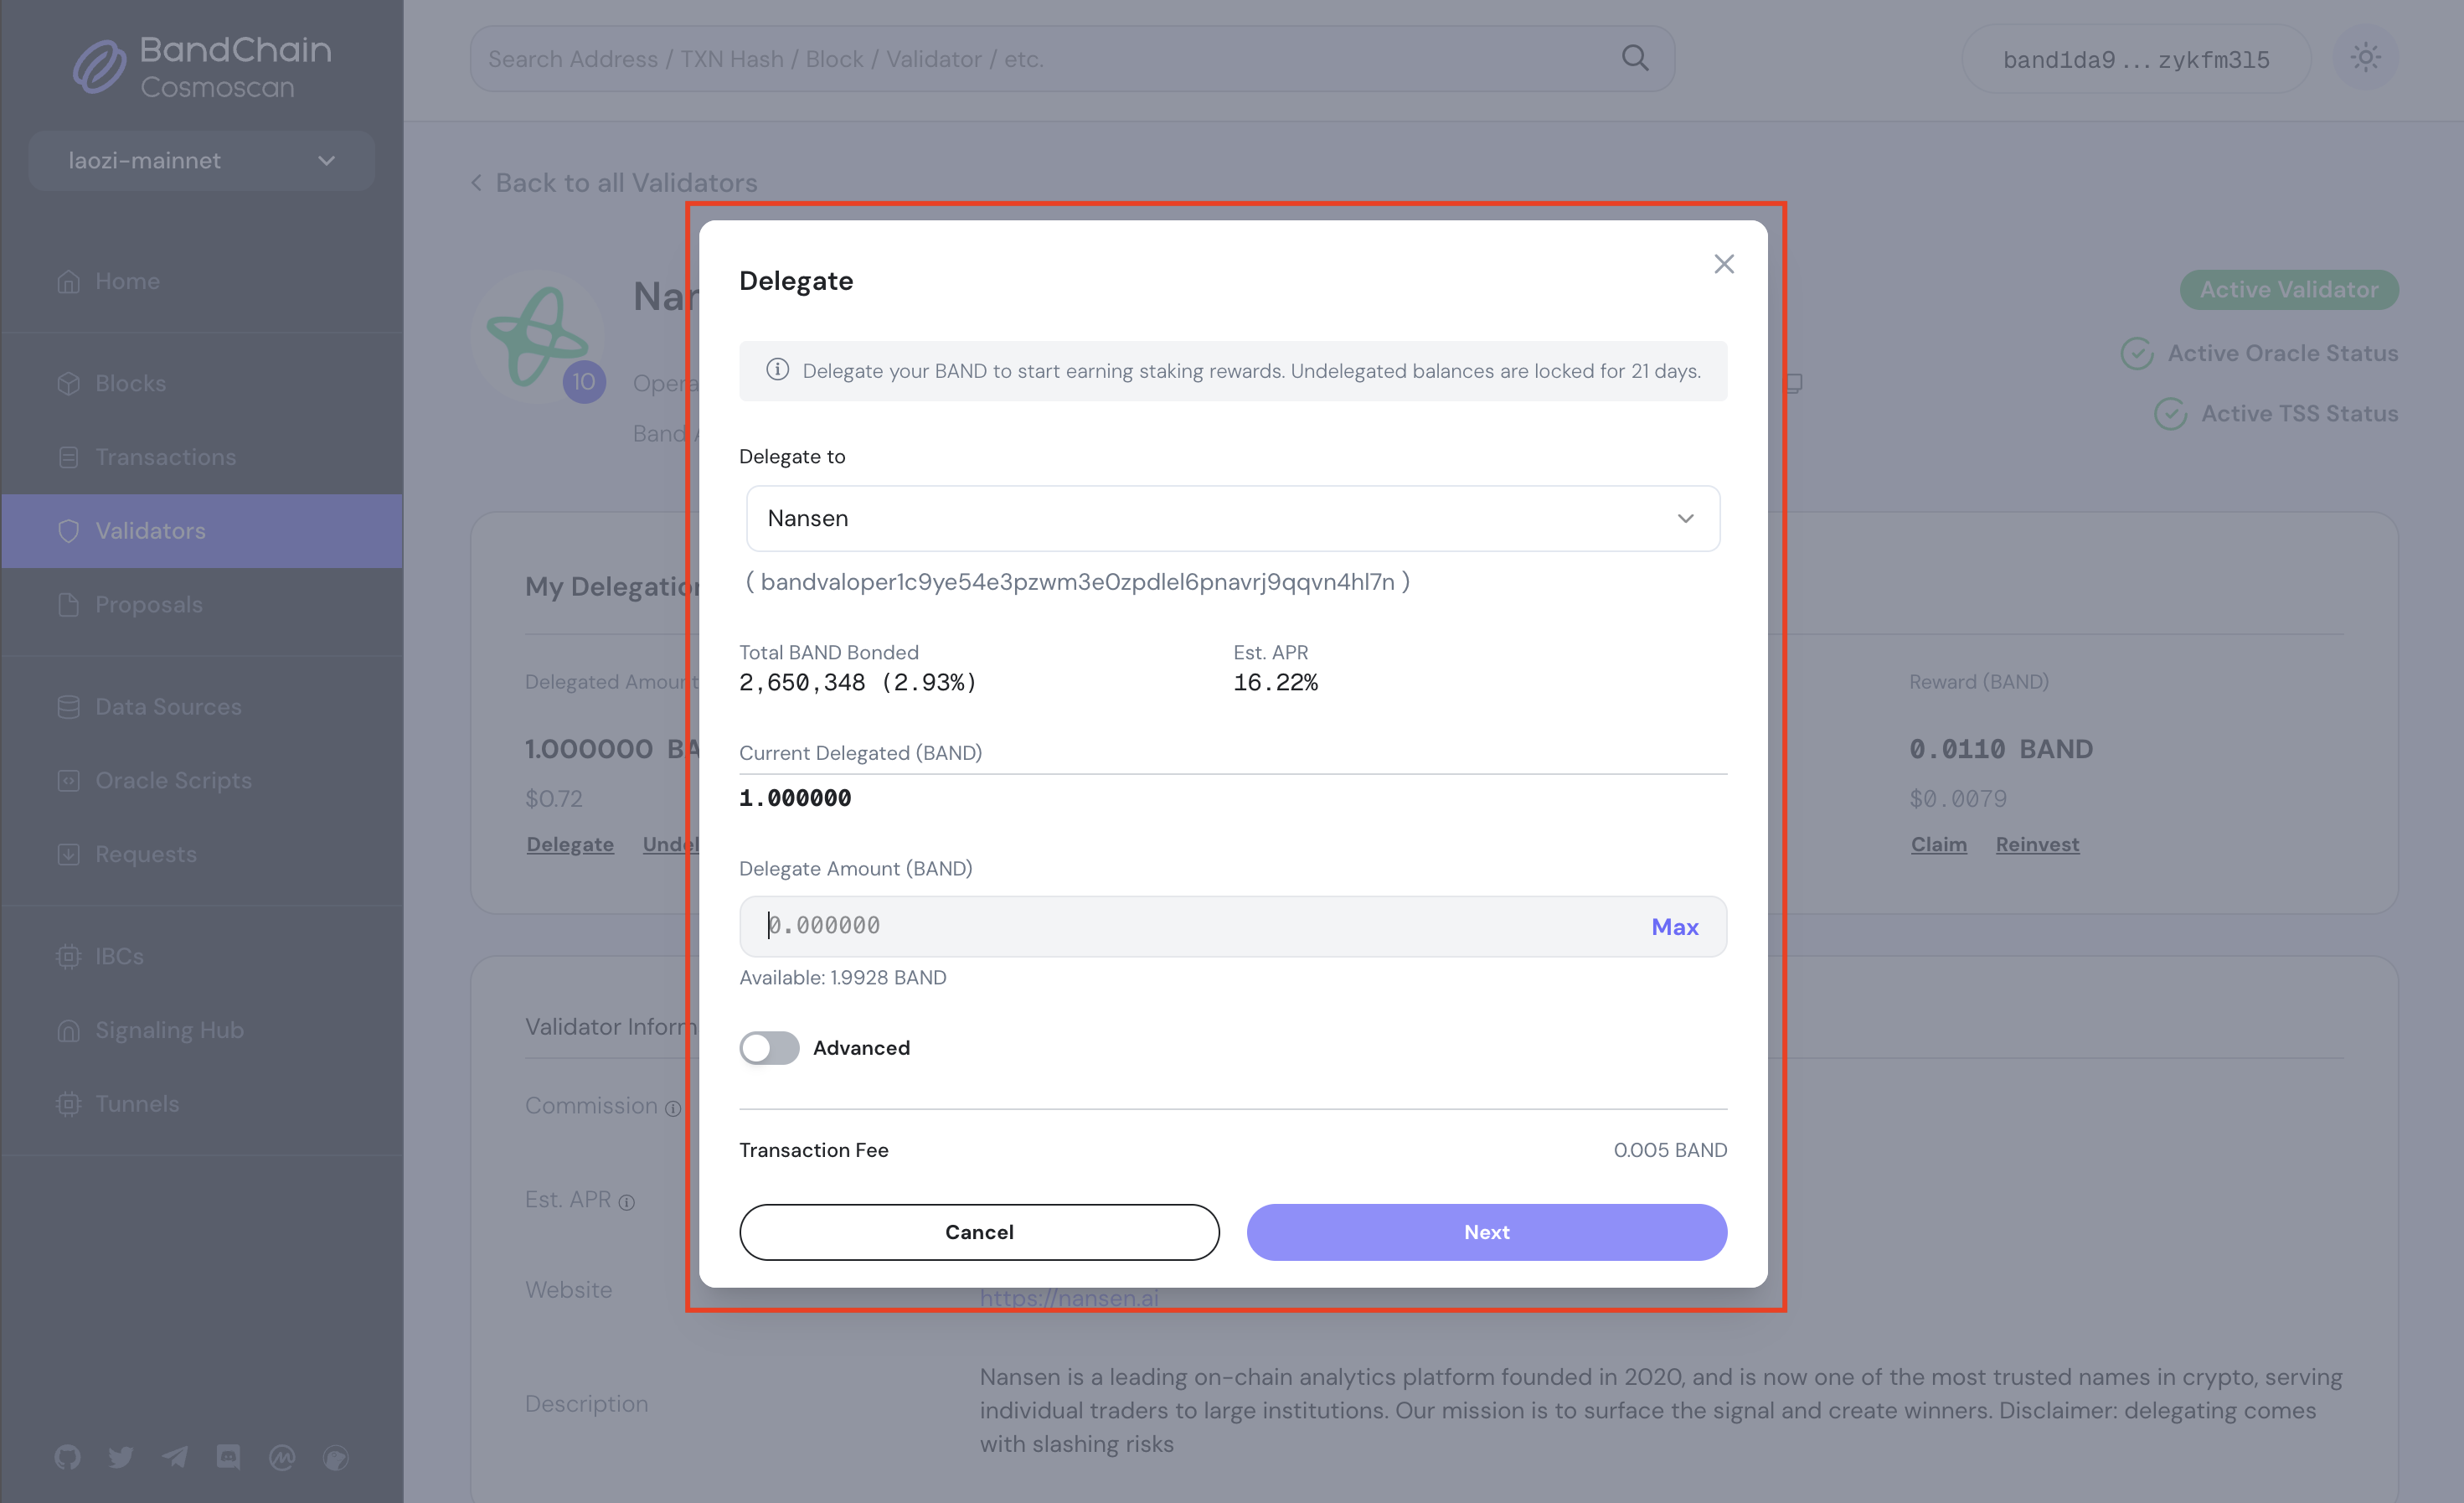
At this point, you'll see transaction details for your delegation. Review the information, and if everything is ok, click Broadcast.
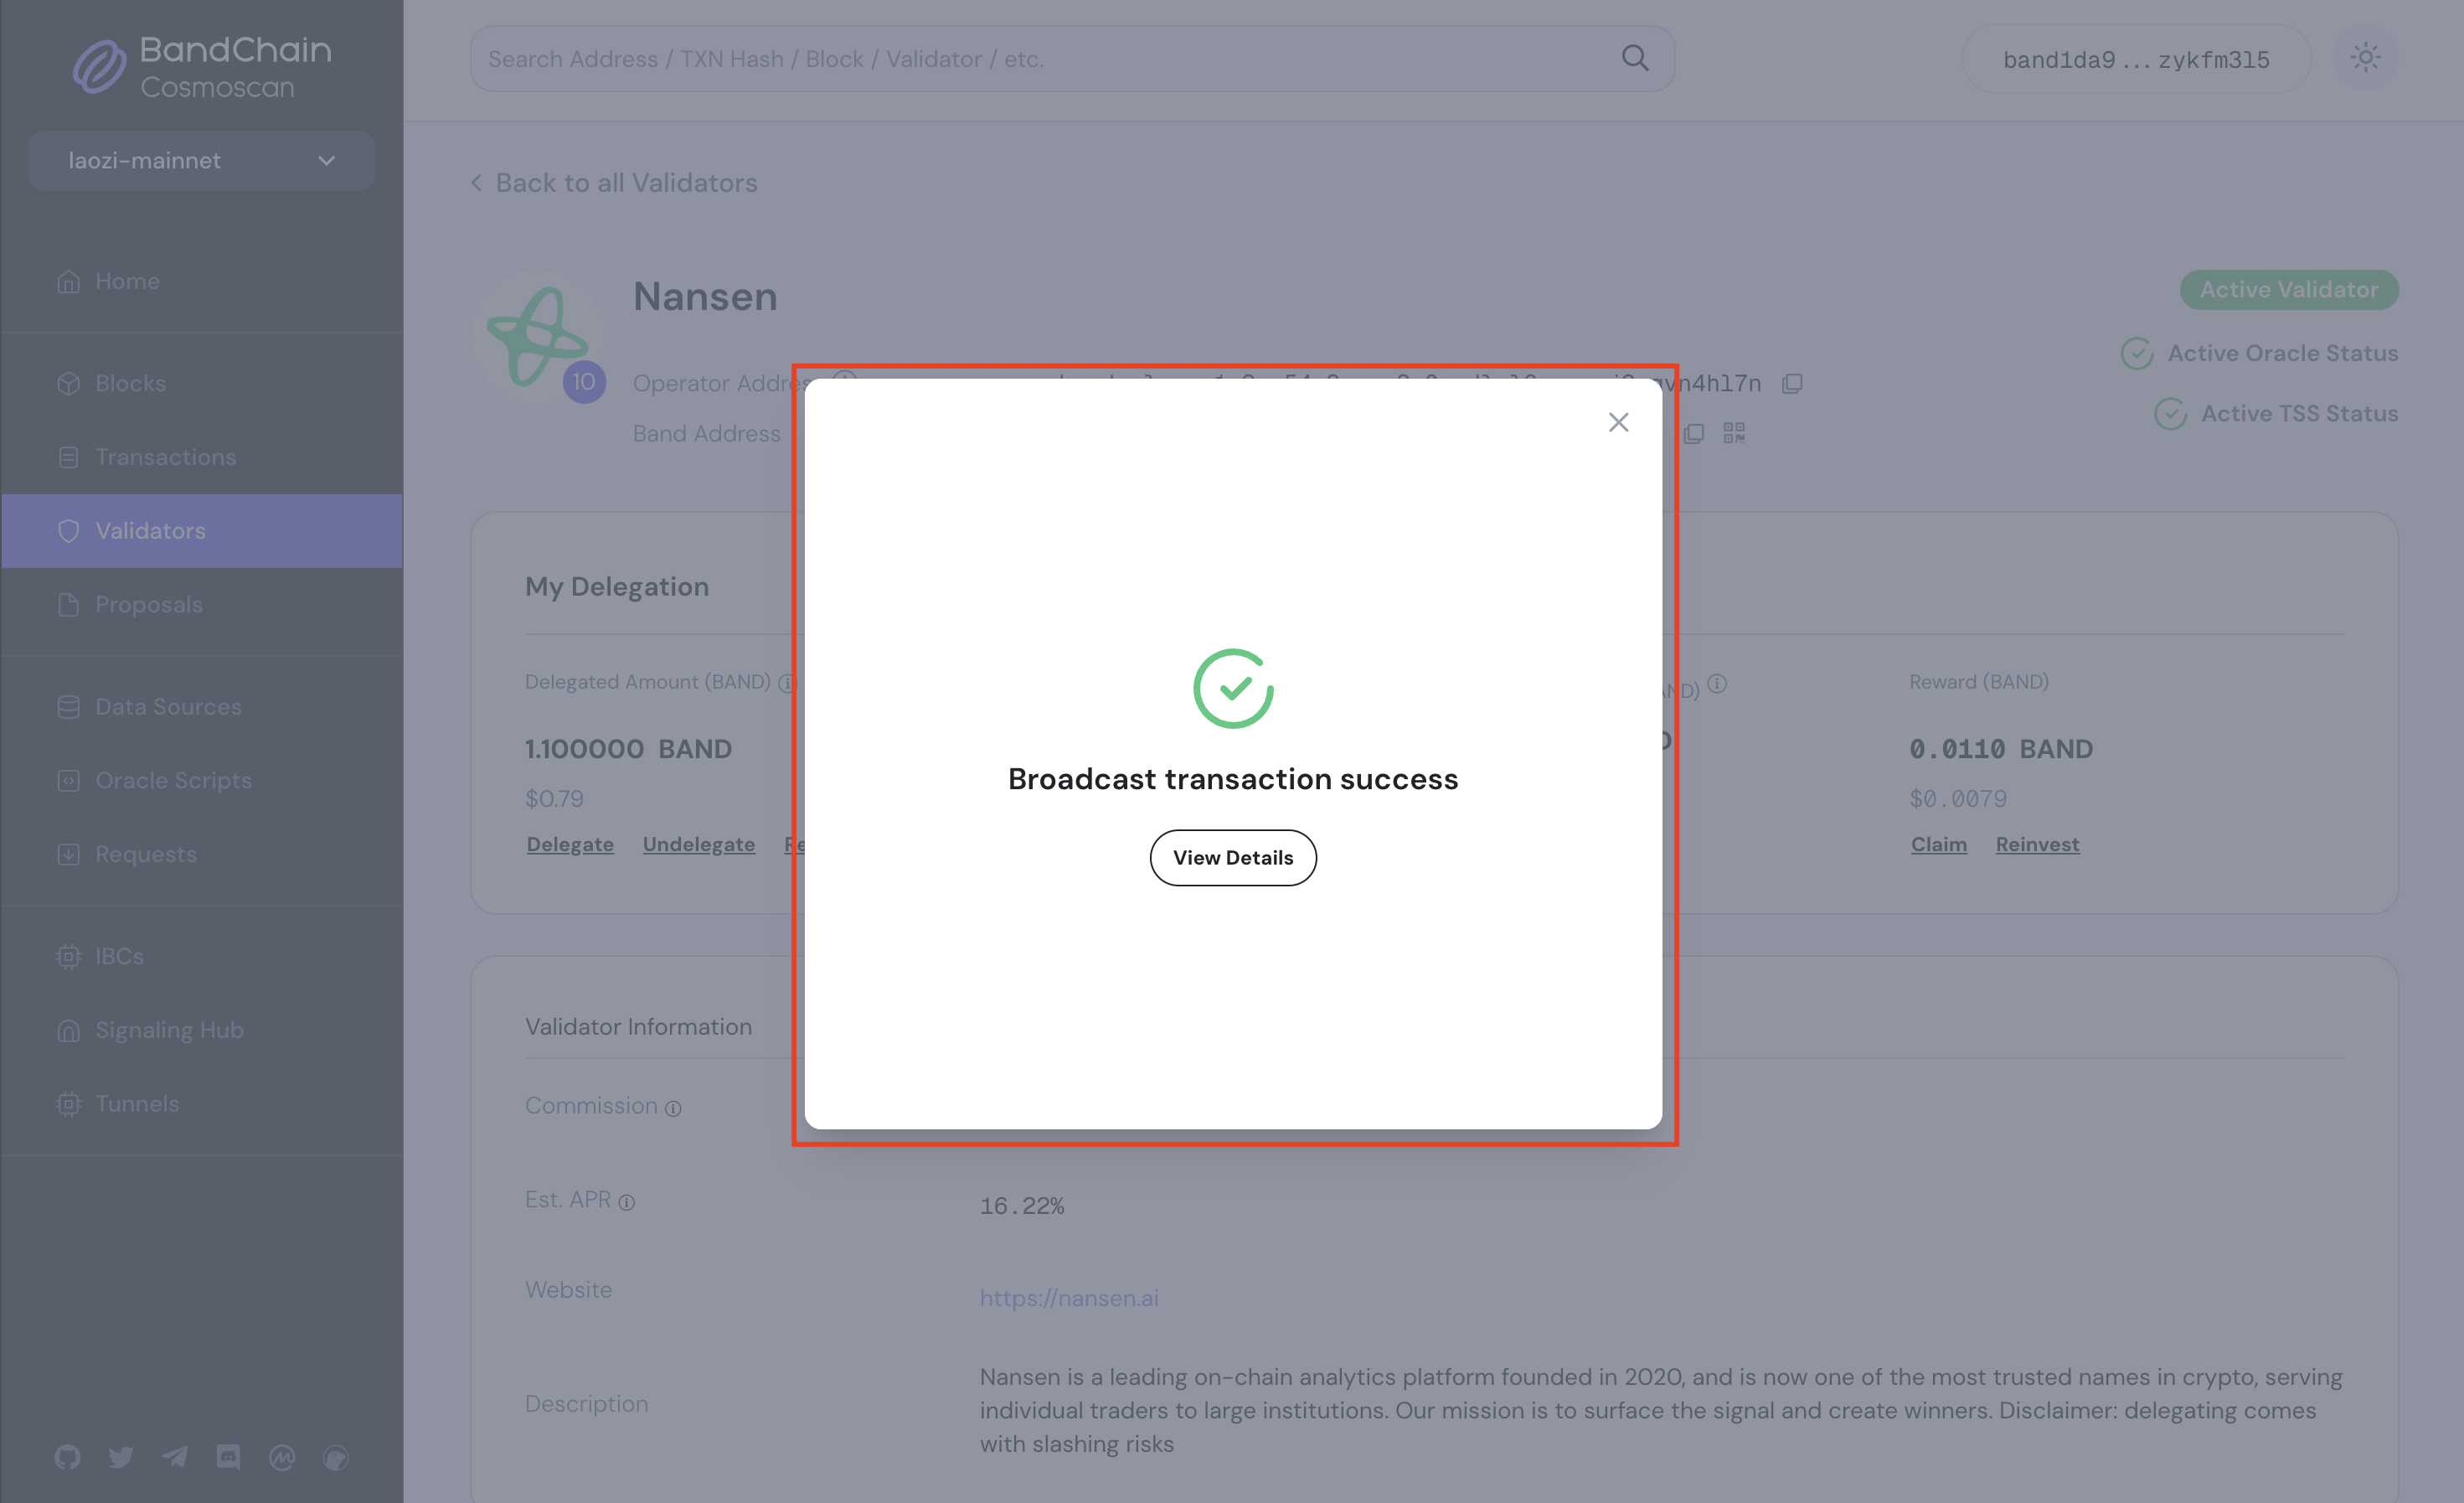
Voila! You have successfully delegated your BAND tokens. Congratulations on taking this step in staking and earning rewards on your tokens!
To verify your transaction, navigate back to your Account Details page. To view detailed information about your account, click the drop-down arrow, then click your address prefixed with band to navigate to your account details page.
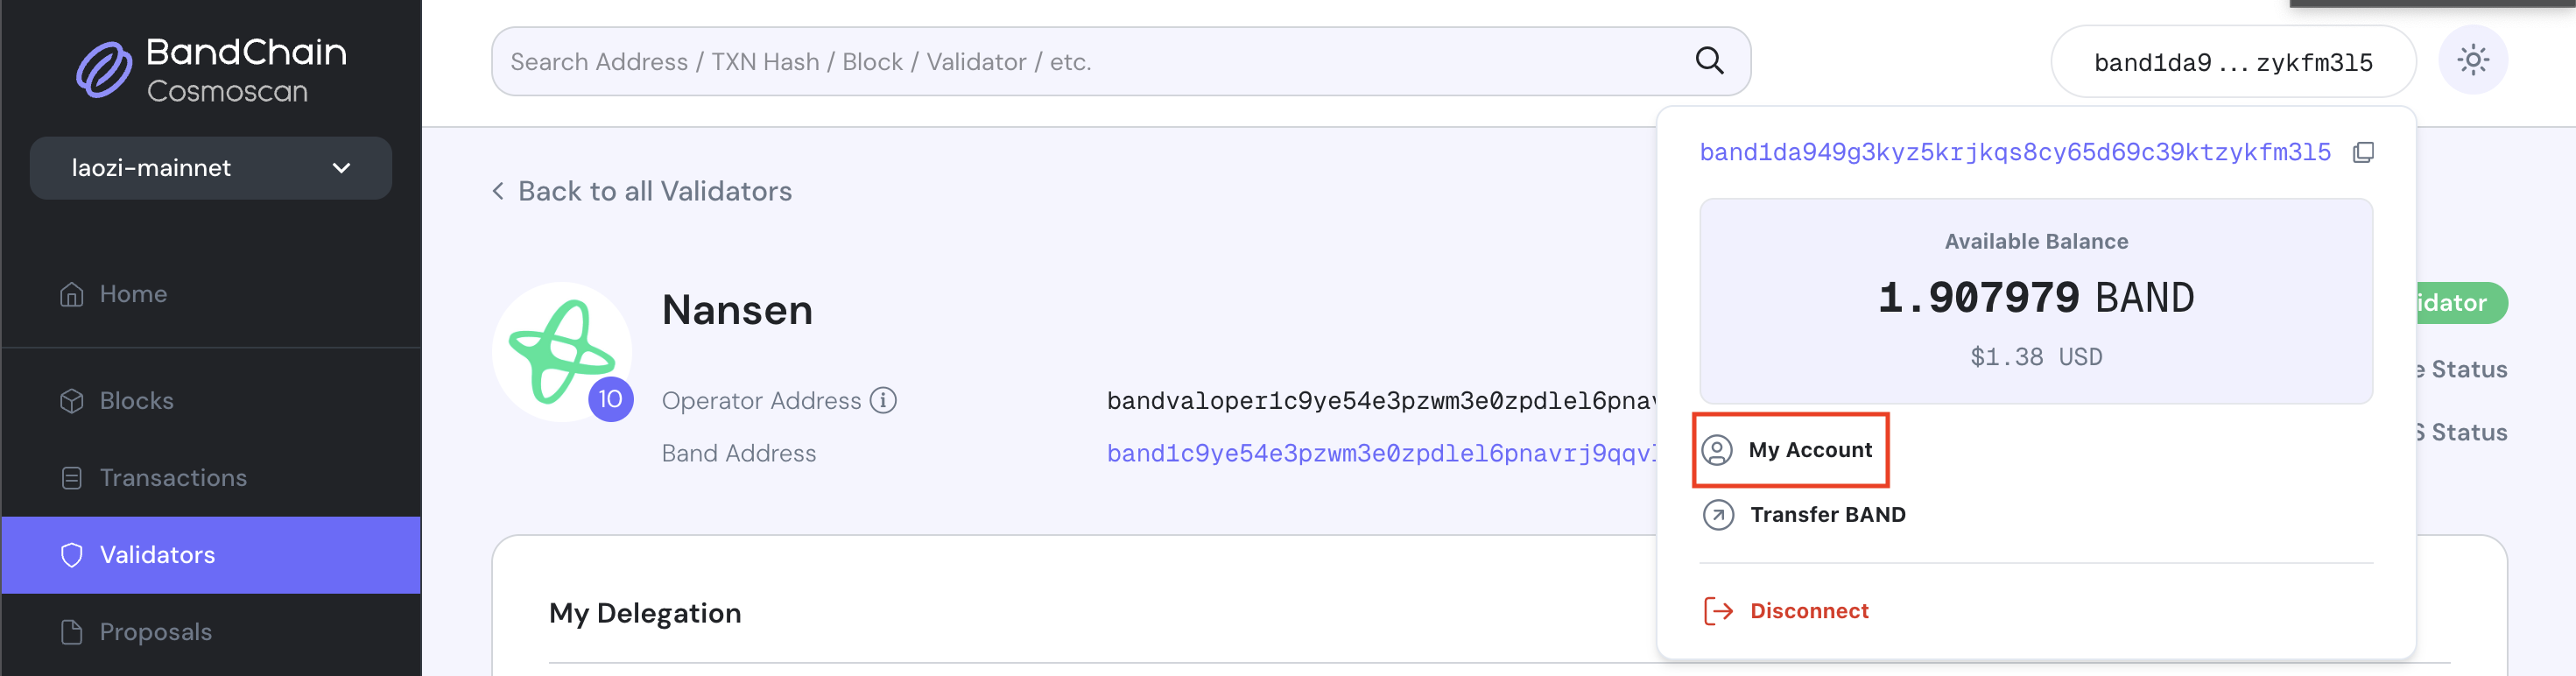
you'll be able to see the updated status showing that you've delegated to your chosen validator.

Next — Manage your BAND stake
Once you have staked your BAND, you have 4 options to consider.
- Undelegate
- Redelegate
- Claim Rewards
- Reinvest